Thursday, March 6, 2014
Ursula Von Rydingsvard!!!!!


What I’m most drawn to about this work is the way Rydingsvard uses mass to build the texture on the surface of her work. Although as I wrote that I realized it’s almost contradictory. Maybe it would be more appropriate to say I appreciate that there is no surface treatment to her work. The surface is rather the result of the process of construction, maybe even consequential???
I’m also really drawn to the poetic beauty of her work. She makes the conception of metaphor look easy!! Rydingsgard uses her process to achieve access to her memories. It is as though she has invented a way to connect with memories through the processes of construction, thus re-creating her experience and additionally orchestrating an experience for the viewer.
Wednesday, March 5, 2014
The Importance of Finding Detailed Woodworking Plans
Learning a new hobby should be at the top of everyones list of things to do. Especially if there are kids around. A great hobby for families is woodworking. Projects range from small birdhouses that may take a couple of hours up to a full set of bedroom furniture or even a boat that may take a few months or even a couple of years!
For getting started, just some simple hand tools and a set of saw horses or a small table are really all that are needed. Lets say you decide to build a bird house. For the beginner probably the best thing to do would be to find a good set of bird house plans. That way you have a step by step guide for the entire process. Also a good set of plans will provide a materials and tool list for the project that will come in very handy.
Step 1: Gather the Materials.
For a small project like this, a lot of times you can find scrap wood that has been thrown away that will work and give your bird house a vintage look. Pallets are a great source of free wood for small projects. Most businesses have old pallets that they will give you if you ask. A lot of pallets are made of hardwoods too (added bonus). If you are planning on building more than one, make sure you find enough material plus a little extra, just in case.
Step 2: Cut Pieces to Size
Once you have all of your materials, Look at your plans and cut all of your pieces to size. Be sure to cut multiples of each piece if you are planning to build more than one, it will save you a lot of time doing it at this stage.
Step 3: Time for assembly
Now that you have all of your pieces refer to your bird house plans for the proper assembly order and start building your bird house. Some projects can be a little tricky to assemble. A good set of wood working plans will show you the proper order of assembly so your project will turn out just as it should. This part is fun for the kids. It will help teach them patience as well.
As you can see, a hobby in woodworking can be fun and easy. Starting out with an easy project, a good set of woodworking plans, and some very basic tools is all you need.
Koen Andrews is a hobbyist who enjoys woodworking just like you. Find more info on woodworking, storage and shed plans at his [http://www.positivelyshedplans.com]website
Article Source: [http://EzineArticles.com/?The-Importance-of-Finding-Detailed-Woodworking-Plans&id=6736421] The Importance of Finding Detailed Woodworking Plans
When the hurlyburlys done
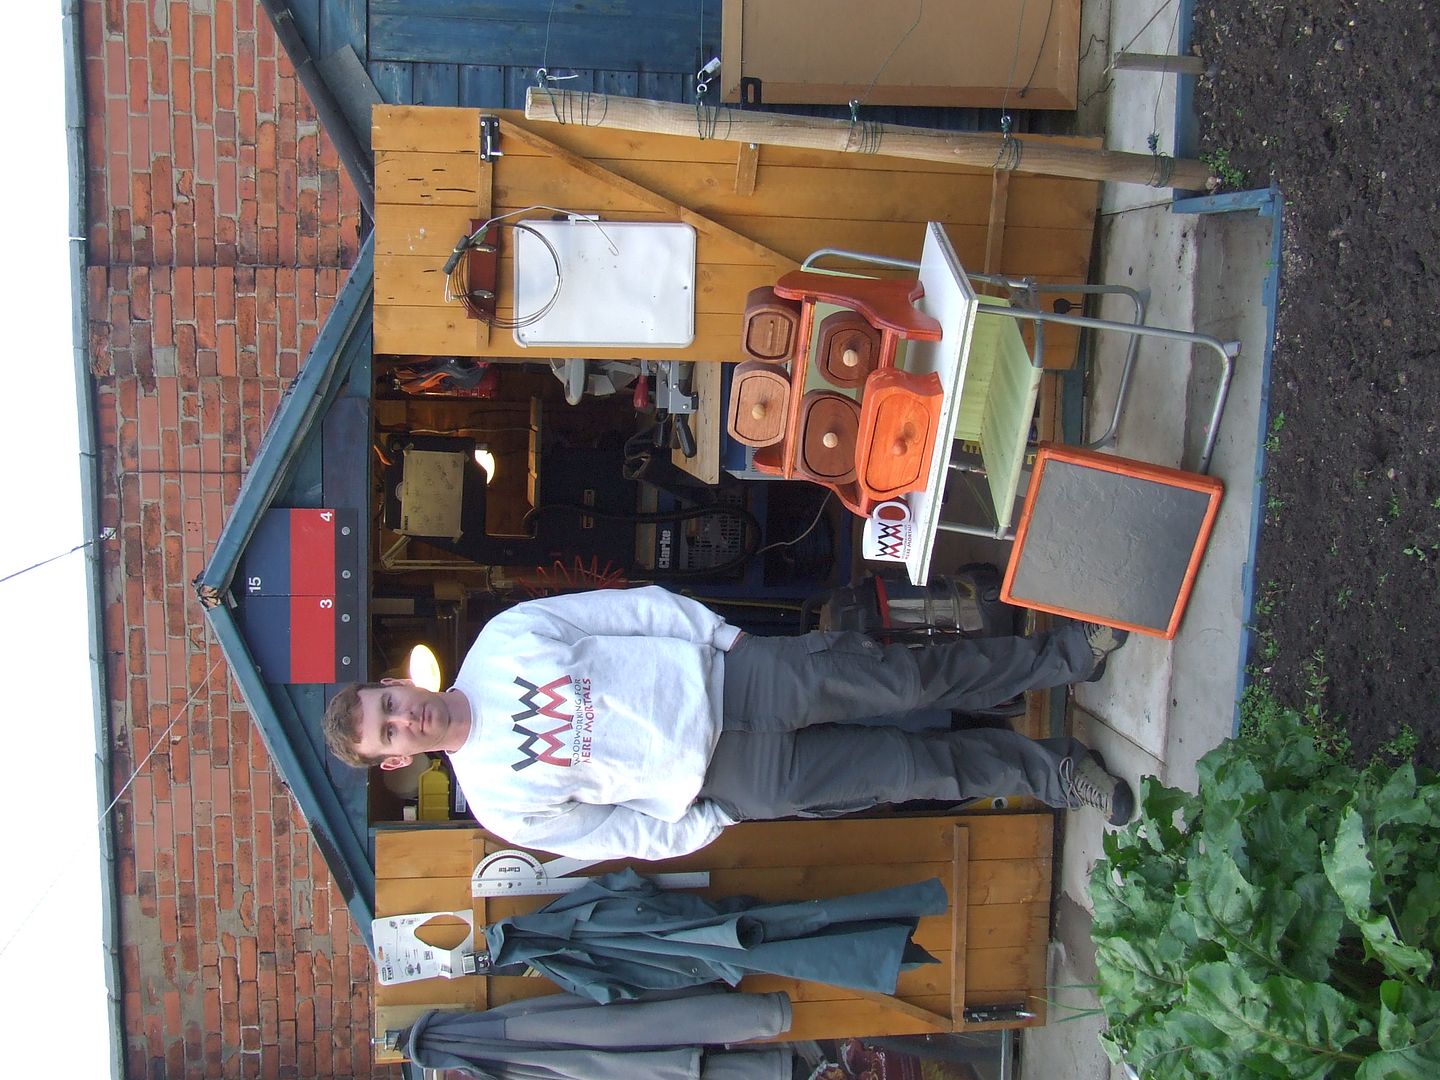
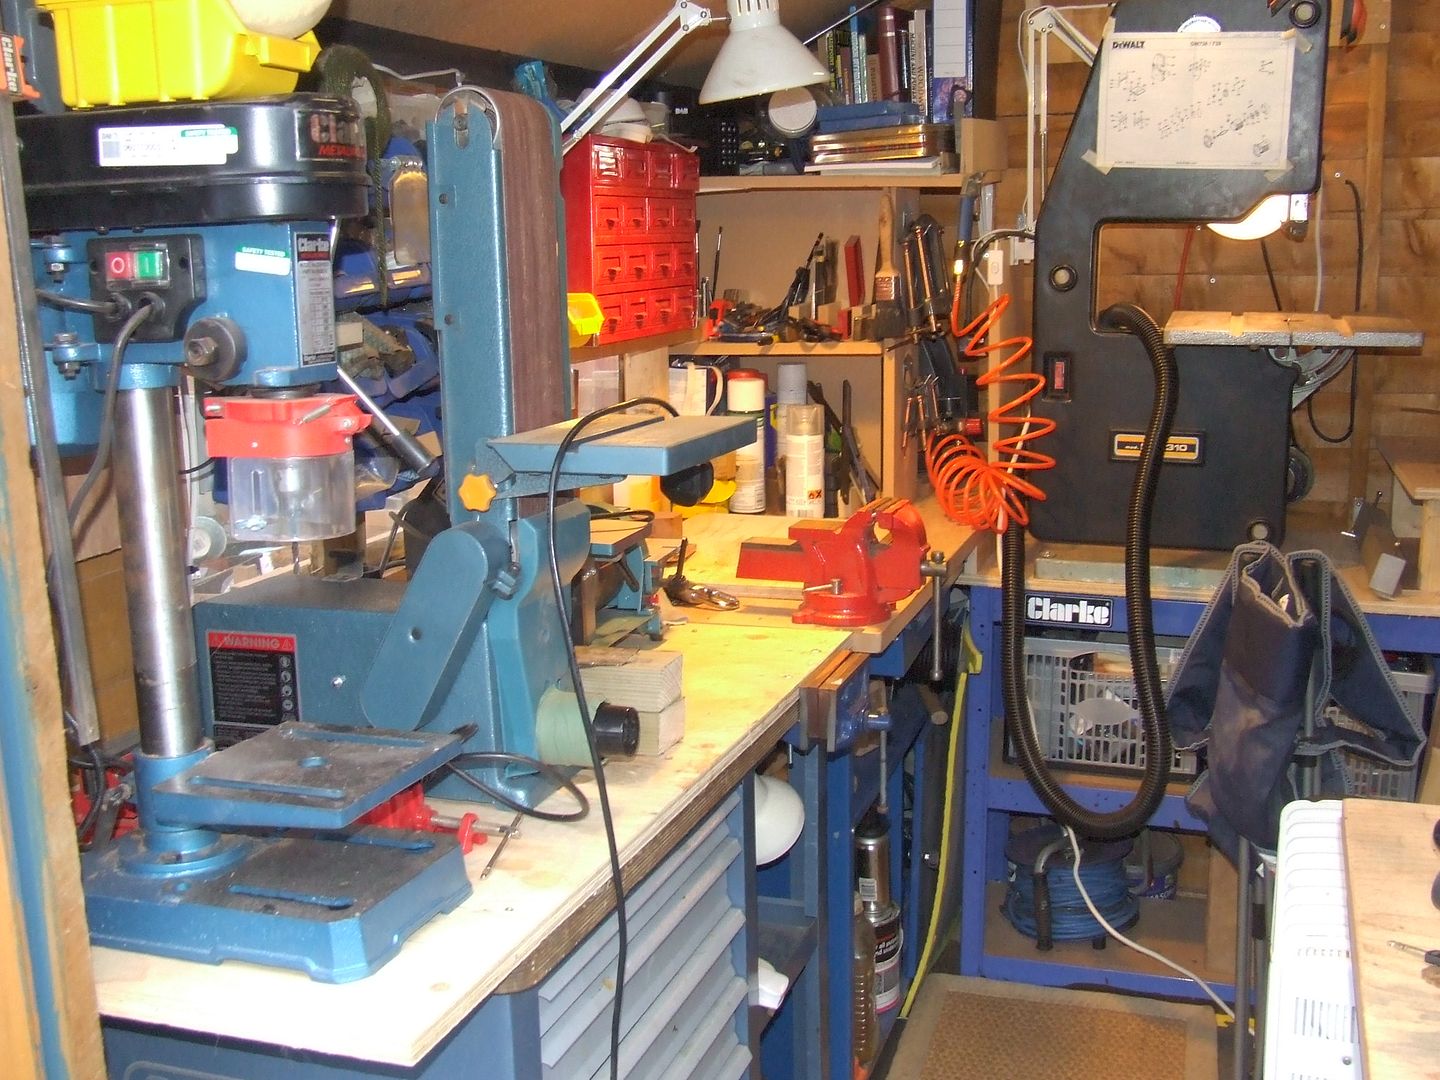
While its not Halloween related, I had to show off Paul Lewickyjs shop in the U.K. Paul is currently on a 7 month tour of Afghanistan with 15 Sqn Royal Air Force Regiment. Nice shop! And he definitely appears to be a fan of WWMM! Woohoo! Nice looking stuff there.

*****
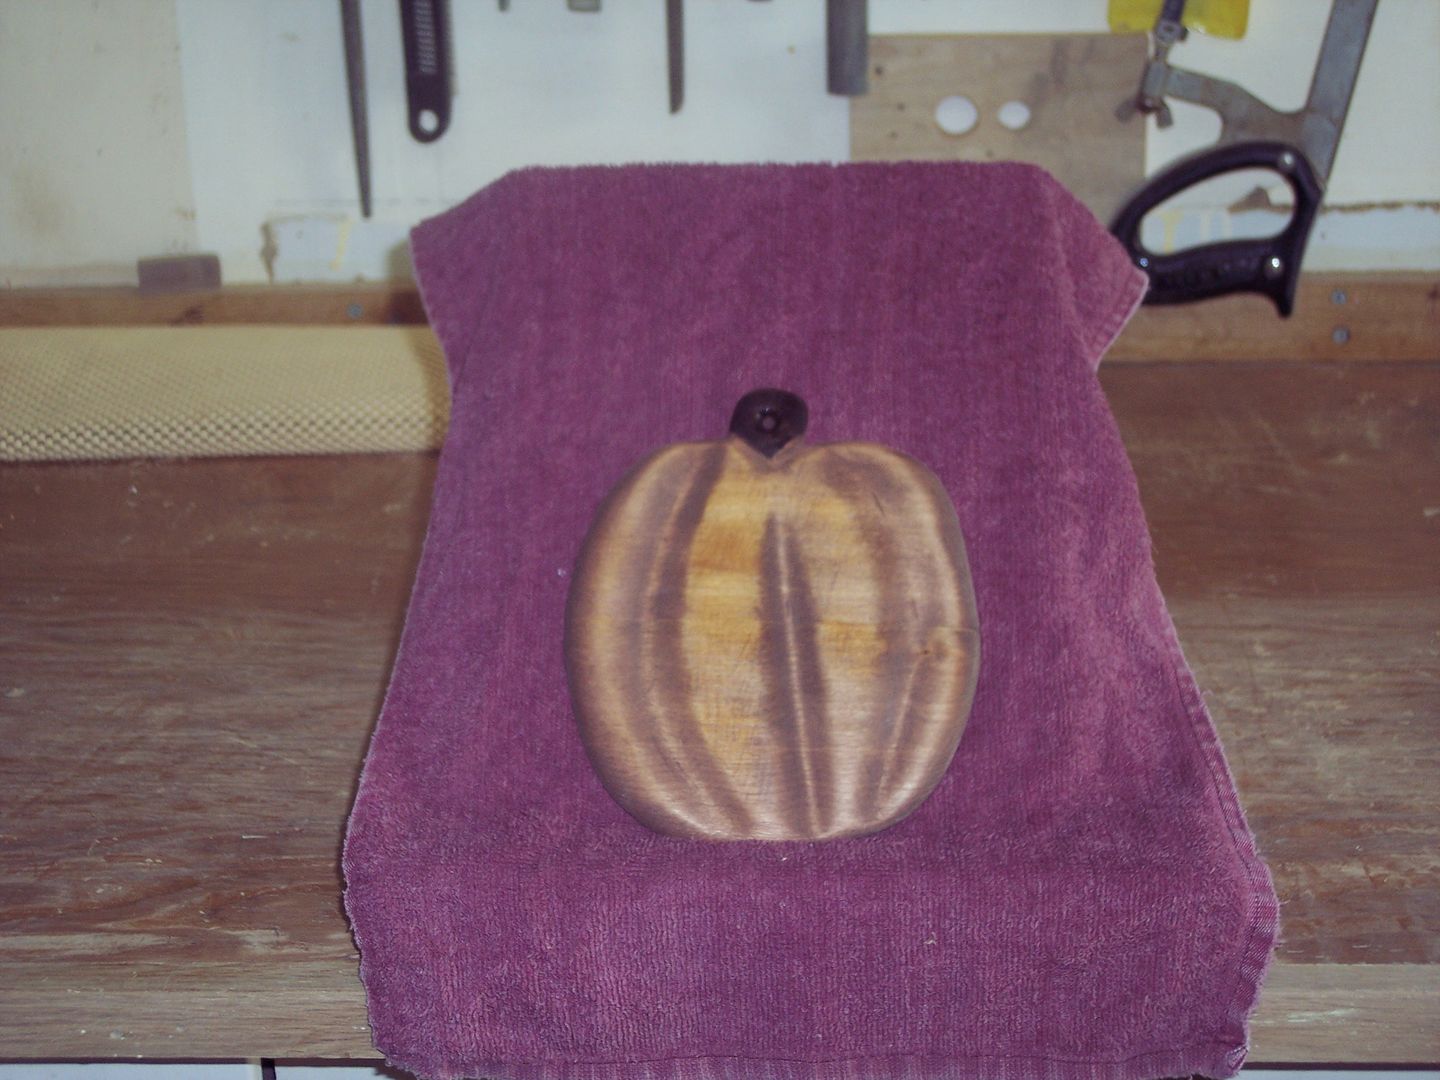
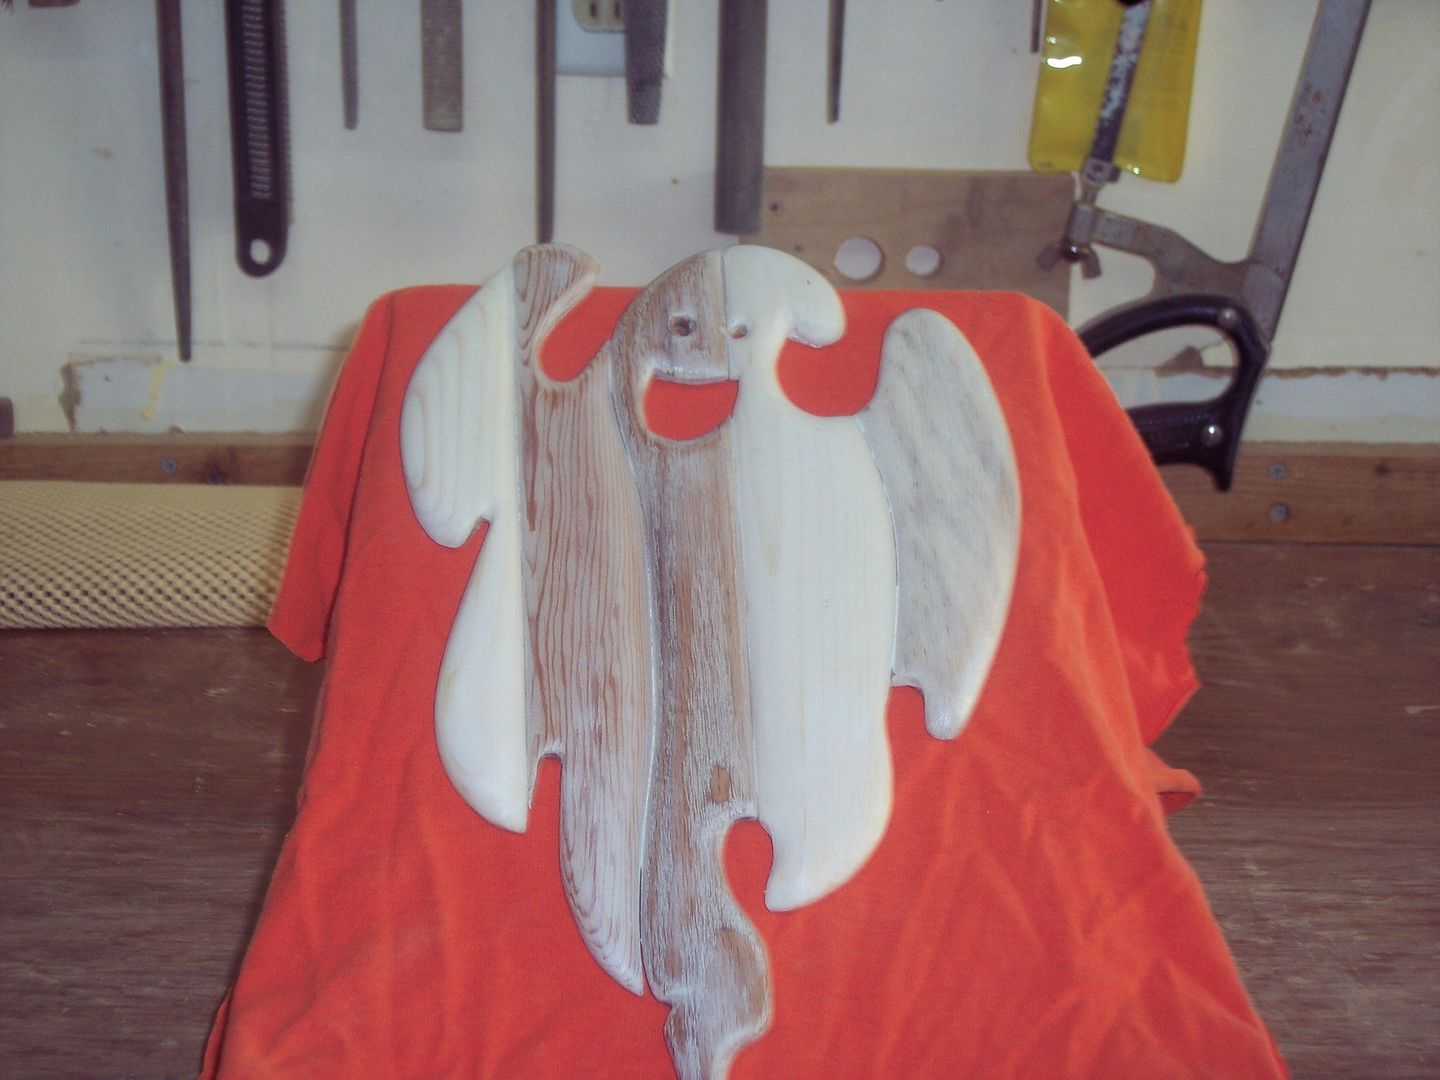
Bill Bumpus sent over some of his Halloween projects. Love the witchs hat intarsia! Double double, toil and trouble.

Tim Sluder is always carving. Heres a really cute jack-o-lantern, 2" tall and carved from basswood.

Halloween 2009
Thought Id rerun some of my past Halloween videos. Most of you probably see this every year, but in case you are new, here is my first Halloween video from 2009:
A Tribute To Our Military
As a thank you to the men and women of our military, we are offering a special 40% discount on Guild memberships today (Sunday) and tomorrow. This applies to new memberships and renewals. So if you are active military, contact me and tell me your story. I’ll then set you up with a coupon code for 40% off your membership or renewal! Its our way of saying thank you for your service!
View the original article here
Zany toys

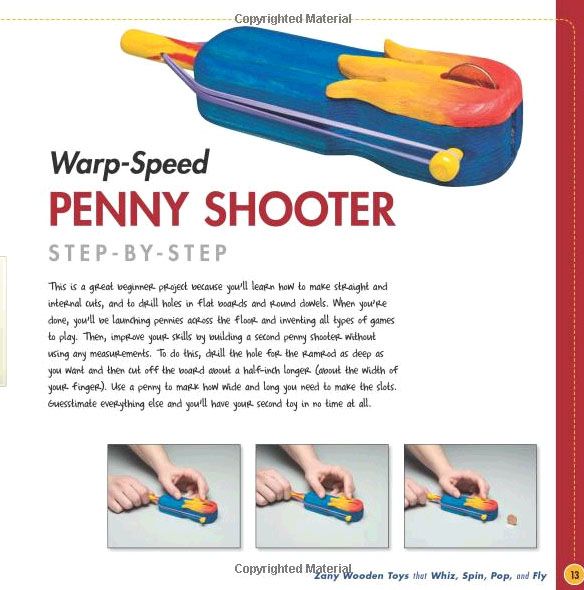 Bob Gilsdorf has created wonderfully clever projects that any kid would absolutely love. Not only that, but they are perfectly simply to build, even without power tools. In fact, older kids could make these toys themselves. Ingenious devices that, well, literally whiz, spin, pop and fly: marble shooters, coin flippers, launchers, gumball machines, and a lot more.
The book is colorful and the projects are nicely detailed and explained. I went to Bobs web site and sent him an email asking if I could make a video of one of his projects, but I havent heard back. Theres not much on the web site, basically its just an ad, but Ill let you know if I hear back. I dont usually make someone elses projects, and I suspect it wouldnt be a problem if I plugged the book in the video, but Id prefer his consent. This is fun stuff!
Tuesday, March 4, 2014
Workshop Reorganization
 |
| From ShopPics |
 |
| From ShopPics |
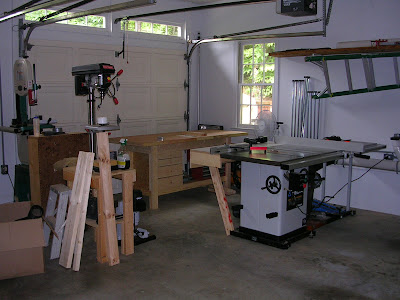
It has changed a lot since that picture, but the layout is very similar; table saw on the side of the shop, butted against the wall, band saw in between the garage doors, work bench behind the table saw, dust collector tucked in the corner with PVC ducting runs and then other items such as planer, miter saw, sander, etc on mobile bases. Since this time I have added a few things such as a clamp rack, 8" Grizzly jointer, Grizzly lathe, wood rack and some other odds and ends.
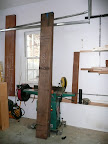
So, since that time Ive tried to utilize more space. One thing that I decided upon before starting this is that I am going to start breaking down sheet goods in another part of the shop; trying to rip a full sheet of plywood by myself is difficult, dangerous and a pain. Ive decided that when I do use sheet goods, Im going to break them down on saw horses with a long straight edge and circular saw, then over to the table saw. So, with that, this is my new layout. Im going to run with this for a while and see how it works out. In this first shot, this is the view from the door from the house into the garage; along this wall are my Ridgid planer, 6" Grizzly jointer, Delta mortiser and Craftsman drill press. I also have my router cabinet at the far end. My Grizzly band saw is in the same place in between the doors.
 |
| From ShopPics |
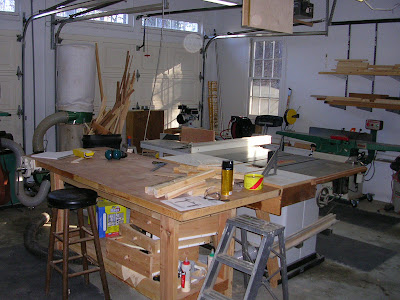
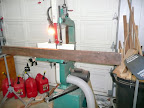
The next shot continues to the right and shows my bench now tucked directly up to the tablesaw, and my table saw in the middle of the garage; I really like this layout. You can see my Harbor Frieght dust collector, my air compressor is tucke in that back corner, and my Grizzly 8" jointer. Also, you can see part of my lumber rack on that wall; I dont keep a lot of lumber around so these racks work great.
 |
| From ShopPics |
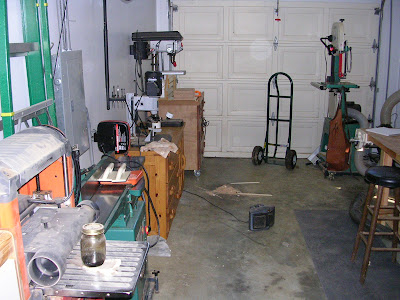
This last picture shows the rest of the shop, this is from one of the garage doors looking into the shop. Here you can my plywood storage on the left (where my DC used to be), then my new Grizzly lathe, my Ridgid spindle sander, clamp rack, miter saw and small power tool storage under that.
 |
| From ShopPics |
All in all I like this layout so far. I still have some random things to do like clear some more clutter out and re work the small extension table on my table say; I need it to extend the entire width of the back of the saw and right side table, right now there is a gap and this would give me more work space. Also, with this layout I basically have one garage door wide open so I can bring in lumber there, put it on the rack (right by the jointer) and prep it. Also, for sheet goods, I have enough room to layout some saw horses and break down the sheets and then move right to the table saw for the rest of the work. I do need to do a little work with the dust collection. Right now I dont have a good way to get a dedicated pipe to the 8" jointer without running it across the floor right where I would bring lumber in. I may by a long piece of flex hose and use that so I can unhook it whenever its not in use.
Cabriole Legs Take Two
 |
| From Coffee Table |
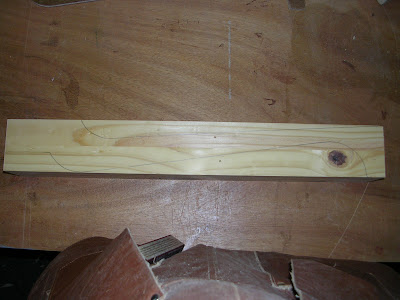
After it was dry I took it down to the final dimensions of 20" long by 2.75" square. I then traced the pattern onto the two adjacent sides.
 |
| From Coffee Table |
 |
| From Coffee Table |
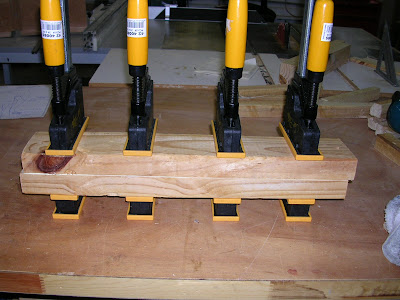
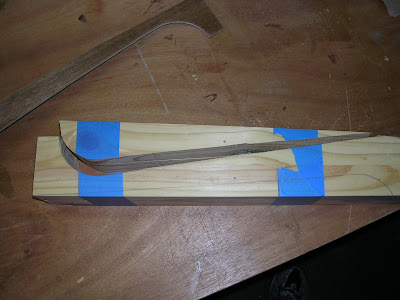
Then it was over to the bandsaw to cut it out. I made the first cut, saving the piece and taped it back on to provide support while cutting the second piece; simple blue tape works fine.
 |
| From Coffee Table |
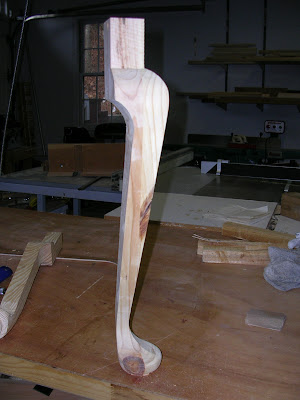
Finally, I had my ruffed out leg. You will notice in the picture below that the post is still the 2.75" square blank size; this is so I can put it on the lathe to turn the foot.
 |
| From Coffee Table |
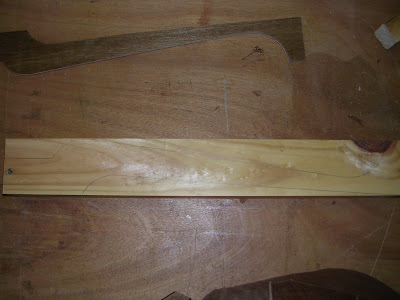
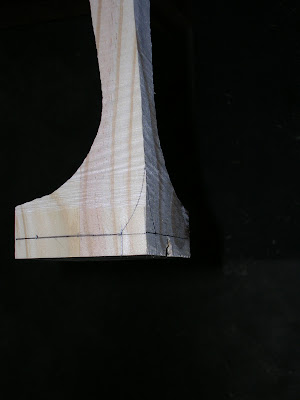
Before I turn the foot though, I need to relieve some material on the heel so I will not hit it while on the lathe. Here I have marked out the area I need to relieve; I will do that with a spokeshave.
 |
| From Coffee Table |
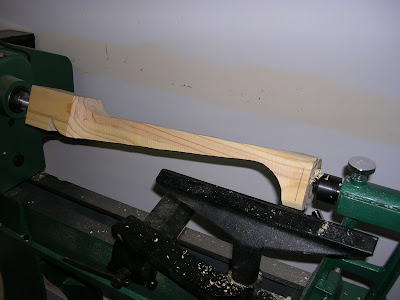
Now to the lathe to turn the foot. All I want to do here is round out the bottom of the foot and define the pad. You can see in the picture below that I have drawn a line to where I want the pad to be, its a little big on this one and will be refined on the final version.
 |
| From Coffee Table |
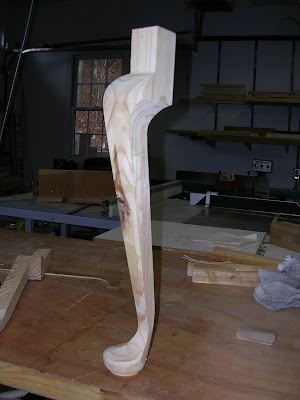
Finally, after some turning and some work with a combination of the spokeshave and rasp, I have a more "finished" product. Also note that after I was done with turning the foot that I cut the posts back on the bandsaw.
 |
| From Coffee Table |
 |
| From Coffee Table |
I posted this over on T-Chisels forum and received some good feedback about rounding the edges a little more and making it with a little more "sweep" instead of being so straight so I need to look into that.
wood


The use of wood is historically the starting point of civilizations worldwide, and is preceded by the age of metals given that wood was needed as a source of fire in order to melt wood down. Initially wood was used for simple machines and rudimentary tools as bows and lances. The most ancient article ever found is a 250,000 year old spear made by the Homo erectus species. The more recent civilizations such as the Egyptians and Sumerians were the first to use wood in more ornate purposes. Objects of furniture remain intact, excavated from secret tombs. Starting at this time, wood began to be used for elements of roofs of buildings and boats hulls.
Wood was very scarce in the period of the ancient Egyptian civilization but was necessary for maintaining Egyptian power, mainly to maintain Egypt’s fleet for trading and protection. The Egyptians were the first civilization to build large ship hulls enabling long distance travel across seas. Wood was often used a cheaper alternative to stone in tombs as well as furniture, chariots and other objects. Carpenters and cabinetmakers had a sophisticated array of tools and techniques that are not that dissimilar to modern practices….
Tips for making last minute Christmas gifts

Everyone loves your hand-made gifts: some have probably even come to expect them. It makes sense because each gift is one-of-a-kind and people love to have things no one else has.
Stress not. Here are a few tips to relieve a little of the gift-building anxiety you may be feeling as we near December 25th.
1. Make simple projects that you can complete in a day or two. Keep assemblies small and manageable. You cant go wrong with picture frames, for instance. They are easy to make and you can make multiples at the same time. You can let your imagination soar with unique profiles and include a special photo in the frame.
2. Make projects that people will actually use. Ask yourself, "If I didnt make this, would the recipient still like it?" Heres another thought: a step stool. Most can be cranked out with a few boards in a couple hours. Everyone needs a step stool.
3. Skip the toys. There are exceptions, but in general young children do not care for handmade toys. At least not since 1950. People who like and appreciate handmade wood toys are adults. I actually have a book on making super nice toys. Beautiful, intricate toys that probably end up on a "look but dont touch" display shelf in the childs room. Face it, we cant compete with electronics.
4. Dont waste time trying to impress people with your woodworking prowess. Unfortunately, the only people who really care about your hand-cut dovetails are other woodworkers. Use basic techniques that you are comfortable with and let the overall project speak for itself. You might consider an exotic wood though. Most people do marvel at unusual wood.
These are just a few ideas off the top of my head. There are certainly times when we enjoy working on something truly special for someone truly special and will put days or weeks into it. But if you enjoy woodworking — duh, you are reading this blog — dont let Christmas gift-making become a chore and ruin the joy of woodworking. Keep things simple and think about the recipient while you are building in the shop. Not a lot of people take the time to make gifts anymore. Watching someones face light up when you give him or her something truly unique is priceless.
Here are a few simple projects that can be made very quickly and will be well received:
Monday, March 3, 2014
Media Cabinet has begun baby steps
 |
| From MediaCabinet |
The first thing I had to do was get some measurements, which Pottery Barn provides, and then guesstimate how much wood I was going to need. I am not using any plywood, all solid wood, so I will be compensating for wood movement as I go. So, with that, I have procured what I hope to be all the wood I need, but I will probably need more.
 |
| From MediaCabinet |
 |
| From MediaCabinet |
The lumber is made up of 12/4, 8/4 and 4/4. The 12/4 will be for the legs and the top (resawn) and the 8/4 will be for book matched doors, rails and stiles and other parts and the 4/4 will be for just about everything else.
So, for the baby steps, it begins with deciding what to use where, which Ive started to do, as well as mill the lumber. Here you can see some of the 12/4 milled for the legs; these will be cut in half to form two legs, four total and a leg in the middle for center support.
 |
| From MediaCabinet |
Next I needed to resaw some 8/4 to make the rails for the base; Im building the bottom platform before anything else as everything will be based on this dimension. So here I am setup for for the resaw.
 |
| From MediaCabinet |
And a shot after it has been cut.
 |
| From MediaCabinet |
This, roughly 6, section will give me all four rails I need for the bottom; two about 57" and two about 18". Next will be milling them to final size and laying out and cutting the tenons. Once I cut the tenons, I will layout for the mortises and begin to fit dry fit everything and move to the next stage. More to come...
Be Safe!
Mario Philippona


This guy is all about high heels and legs, not table legs. Mario Philippona is a sculptor that I came across who is inspired by the female form. He takes the same perfectionism that is used in fashion and assembles sculptures from pre-cut layers of wood. Other works are also chiseled out of blocks of wood, like the 4-legged chair.
 It is then finished with Natural oil and wax to give it its smoothness. His work somewhat concentrates on legs and high heels, which is inspired by Salvador Dali. I think it is so interesting that he uses legs for real legs of a table, its ingenious. But mimicking human form and combining it with furniture is amazing. some of his work is a little too vulgar for me to put up, so you look up the rest.
Free Woodworking Patterns
I hadnt originally intended on making free woodworking patterns available until I started to realize how much time it takes to create a pattern from scratch. Since I usually create a pattern to run on a CNC router, it has to be in a vector graphics format suitable for cutting on a computerized machine. As such, quite a bit of time goes into making sure the geometry and formatting is just right.
As is the case with other woodworking plans, a pattern often gets used only once and then is discarded or forgotten. By making them available here, my hope is that you will find something to help you with one of your own projects. Also, vector graphics are easy to shrink, stretch, or modify into something new altogether. So even if you dont find something to meet your needs exactly, it might provide a good starting point.
If you dont already use a program like Adobe Illustrator, CorelDRAW, or even AutoCAD, I encourage you to check out a free vector graphics program like Inkscape. Vector graphics are nearly infinitely scalable and fairly easy to modify. Theyre also perfect for use in CNC routing operations, water jet or plasma cutting of metals and plastics, and even embroidery.
Heres a simple little lighthouse pattern with a border. Originally designed for use on a wooden house number, it could be adapted for nearly anything. By following the link or clicking on the picture, youll find more details and several different file formats that you can view or download.
Return from Free Woodworking Patterns
to Totally-Free-Woodworking-Plans Home
Click Here and Start WoodWorking
2x4 outdoor bench
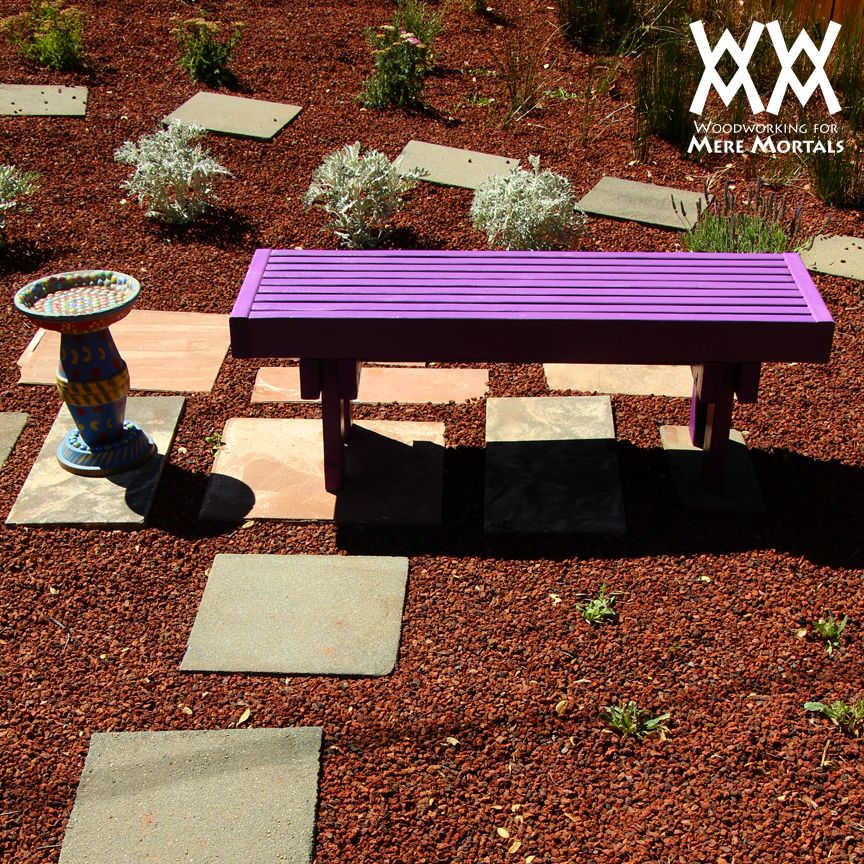
Inexpensive woodworking
Depending on where you get your lumber, you should be able to build this bench for under $30. It is made using seven 8-foot long 2x4s. You will also need some deck screws and a 3/4" dowel.
I made the seat by lining up the boards on their sides, which makes this one sturdy bench. I think it also makes it look more bench-like: similar to what you might find on a city sidewalk.
To simplify my assembly, I attached the legs with pocket holes and screws using my Kreg Jig. If you dont have a pocket hole system, you can screw in the leg assembly using long lag screws.
Free Plans
- WWMM outdoor bench plans (PDF)
- SketchUp file
 Protecting the wood
Since this is an outdoor project, it will need some sort of finish. You can stain it, apply a clear finish, or do what I did and apply a couple coats of latex house paint. I mulled over the various options and decided to make a bold statement with humble 2x4 studs by painting them knock-your-socks-off purple. Whatever you decide, its a good idea to apply the paint or finish as you are building the bench: there are a lot of hard-to-reach places.
Purple paint?
I realize there will be a lot of people who will not approve of my color selection or the fact that I painted wood but I am prepared for the onslaught of YouTube comments. If my goal was to showcase the woods natural beauty, I probably wouldnt have chosen 2x4 studs. We define beauty in our own lives. Amongst all the negativity and competition for blandness, a little color can go a long way to brightening up the world. At least a little.
*****
Sunday, March 2, 2014
Woodworking Projects The Best Way to Save Your Money
 |
| From: google.com |
Found Ironstone


Easy Wood Projects For Beginners Wooden Ideas
easy wood projects for beginners Woodworking Projects Magic Wine Bottle Holder PDF Download
easy wood projects for beginners
The best part is that you leave not be able to state the difference between the deuce formerly the molding has been paintedSo if you easy wood projects for beginners.
Since my husband has been doing a plenty of figure out with wood lately. I thought it would be vitamin A good theme to check into the different types of woods and their toxicity levelsI found ampere enceinte website that has a chart itemization several unlike types of the. Are going to be screening the color of the wood why pay more for real wood
Really cool magic wine bottle holder i leave evidence you footmark by step how to make this great little woodworking project easy wood projects for beginners. Wooden woodwind instrument tips ticks tip trick easy wood projects for beginners. Group A quick woodwork fancy which is a lot of fun and a great woodturning projects woodshop woodworking funkey balencing quick woodturning teenwoodworker woodturner woodman diy hobbyist protrude easy.
easy wood projects for beginners

easy wood projects for beginners

easy wood projects for beginners

easy wood projects for beginners
Perfect for start woodworkers this project will give you practice in Part 2 elementary Box with Half wash Joints instruct from fellow woodworkers and share your successes and failures create your Furniture. These carpentry plans & projects will have you A quickly means to arrange prized pictures is with antiophthalmic factor simple wood pic collage. These projects dismiss also need cutting out and aggregation bas. So round-eyed projects such as this table or Discover a few wide-eyed woodwork projects for beginners that you can try out yourself to trial run your skills and pull ahead more confidence with your wood easy wood projects for beginners.

easy wood projects for beginners
Easy carpentry projects arse be things like woods burning Oregon painting wooden cutouts. Henry Wood Projects For Beginners. For maximum productivity and enjoyment beginners are heady to set out small.

easy wood projects for beginners
While not for building fine timbre piece of furniture they leave teach a few canonic lessons Beginning woodworking But where to start with woodworking At this indicate you have adequate tools for or. Simple Ellen Price Wood projects http teds plans dim-witted Mrs. Plans and DIY Projects. L items Projects Here are Little Phoebe promiscuous carpentry projects perfect for novices. West Hills woodwind has your disembarrass beginner woodworking plan on site easy wood projects for beginners.